
The Rebuild

Deconstructed Birdie
. . . . .
Starting from scratch after the bad news. But on the bright side, she should be good for another 50 years!
My goodness, I wish my house were as clean as this shop!

Looking Solid
. . . . .
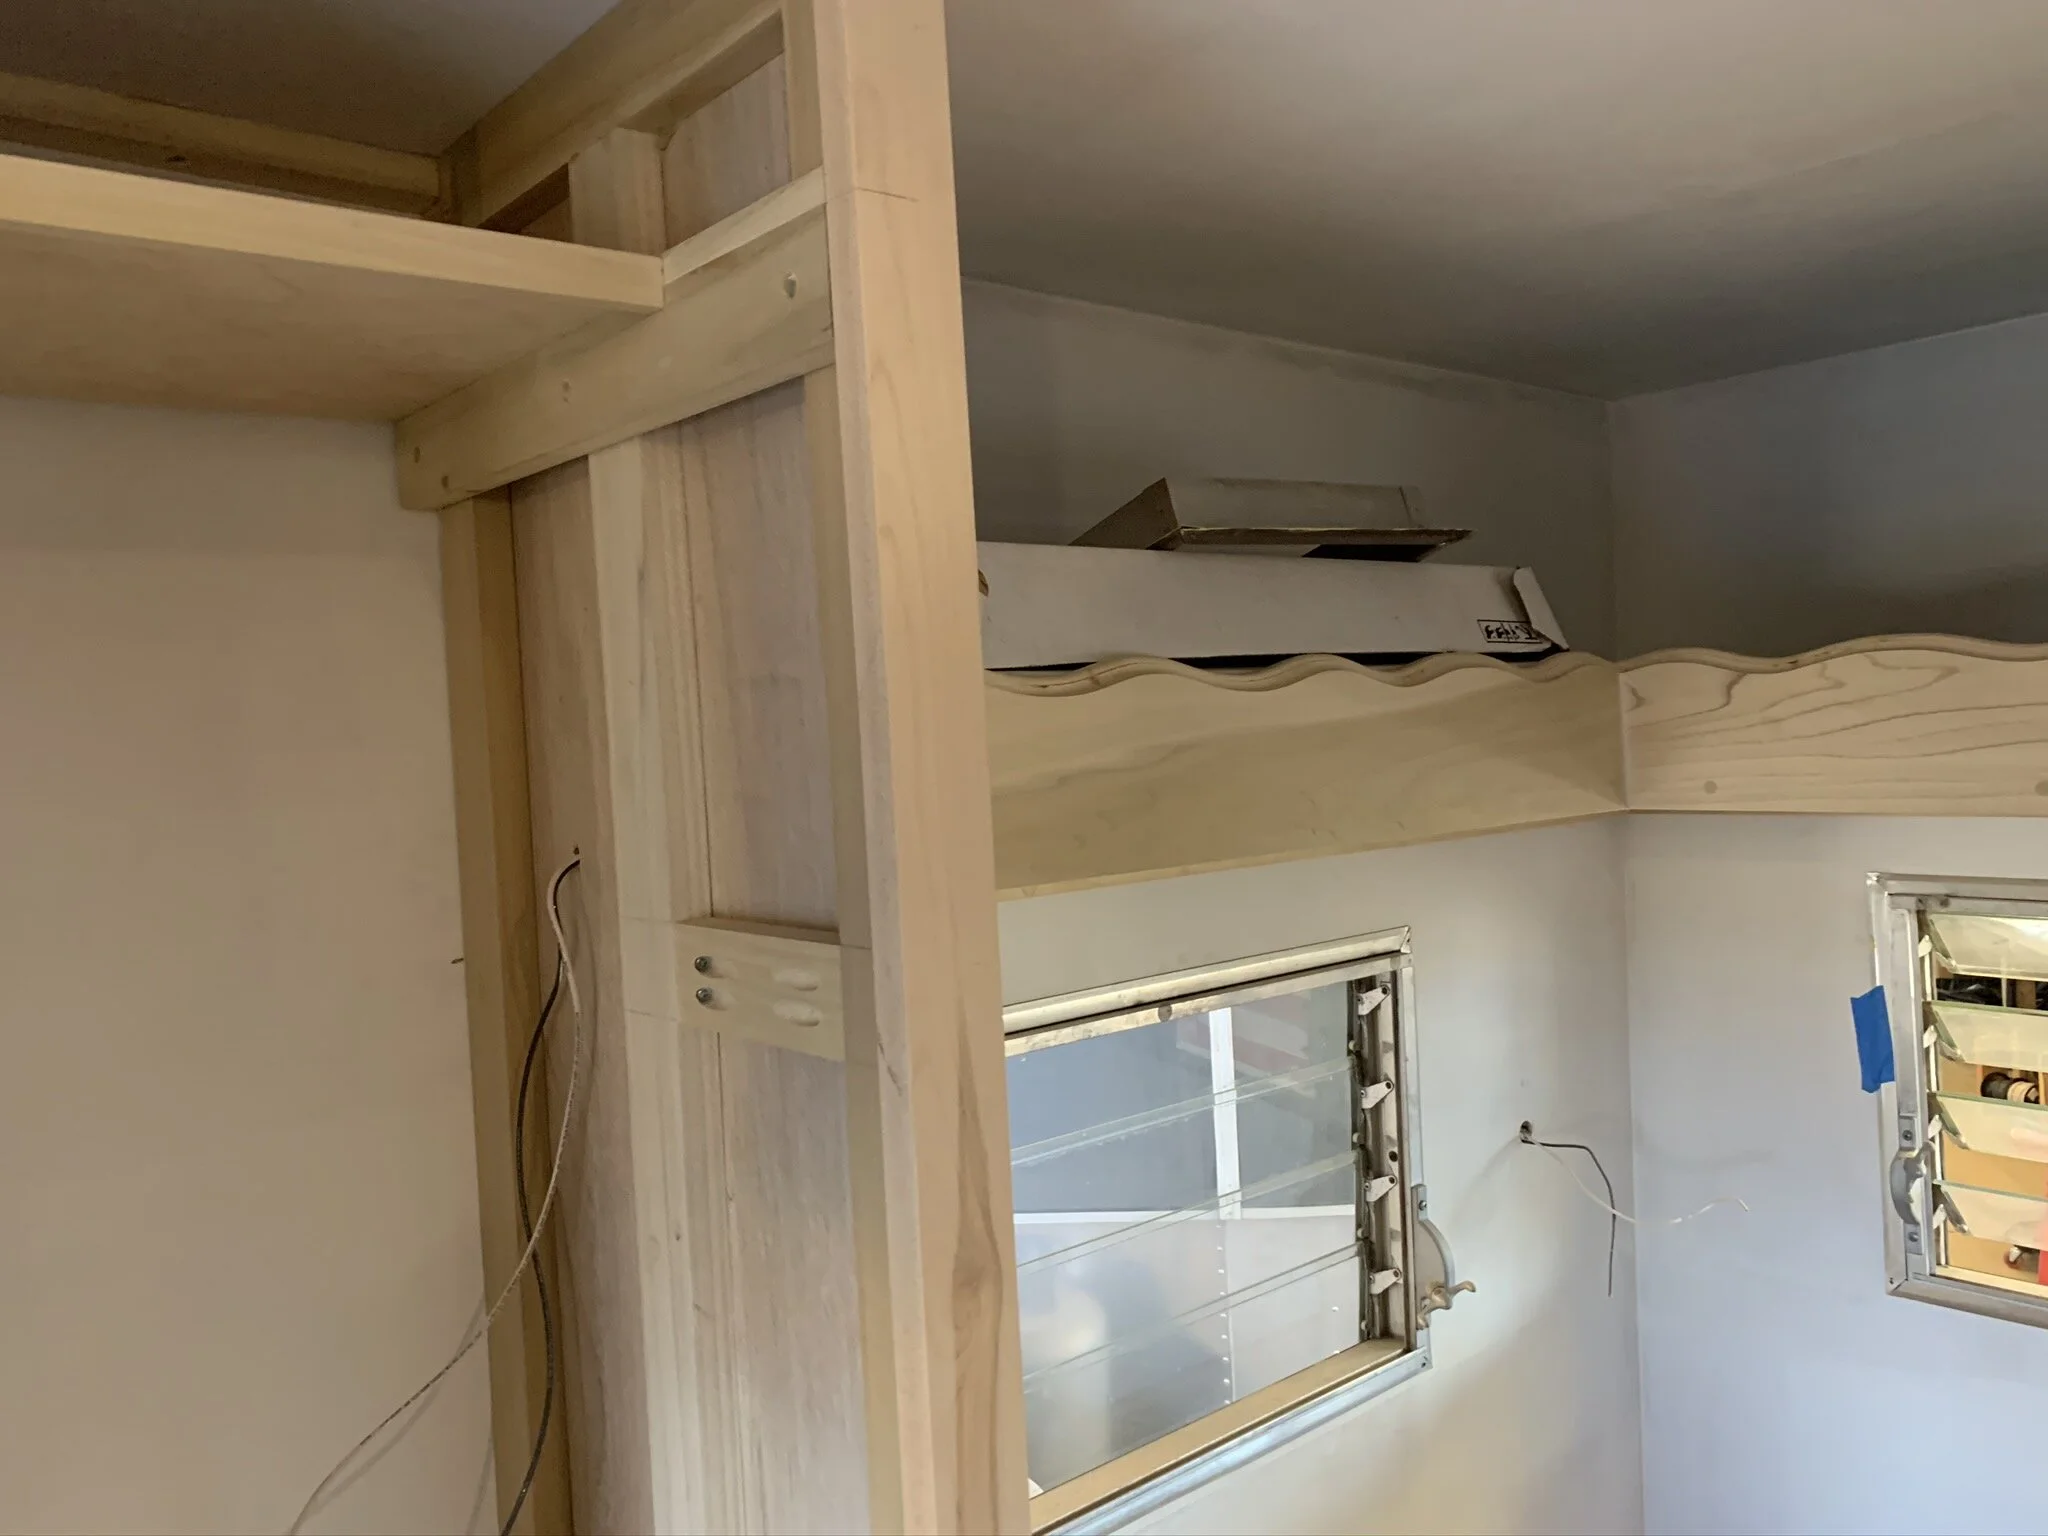
Taking shape again thanks to great craftsmanship! We were taking careful note of where the framing members were so that we could do interior installations down the road and hit studs. The walls of a trailer are very thin.

Lovely Lines
. . . . .
Little by little her new wiring, insulation, and skin was going back on. That’s the access door for the new toilet on the bottom in the foreground.
Choosing and Working with a Restoration/Renovation Shop
. . . . . . . . . .
Neither Bob nor I had the knowledge and skills — not to mention the tools — to tackle the repair-turned-rebuild. We would need to work with a shop experienced with vintage trailers. There were a number of them, but some only worked on Air Streams, others were booked out for years, and one or two had experienced growing pains and were either shut down or overwhelmed. The list narrowed quickly and the project was gaining momentum.
We spoke with several shops and checked reviews before making a decision. The shop we chose was a long way from home, but we figured we would be pulling a tiny home and we’d make a short vacation of it. Another surprise: the number of daily miles you can make towing a trailer is nowhere close to the number of miles you can make just driving a vehicle. We needed to adjust our expectations about time lines and we planned to top off the fuel tank more often.
We — more accurately, I — also needed to adjust and improve my communication with the talented people who would actually be doing the work. Just because I could see it clearly in my mind’s eye didn’t always translate to the same thing in someone else’s view. Pictures are a far more effective way to communicate than a verbal description, and if there are measurements, put them in writing for the benefit of everyone.

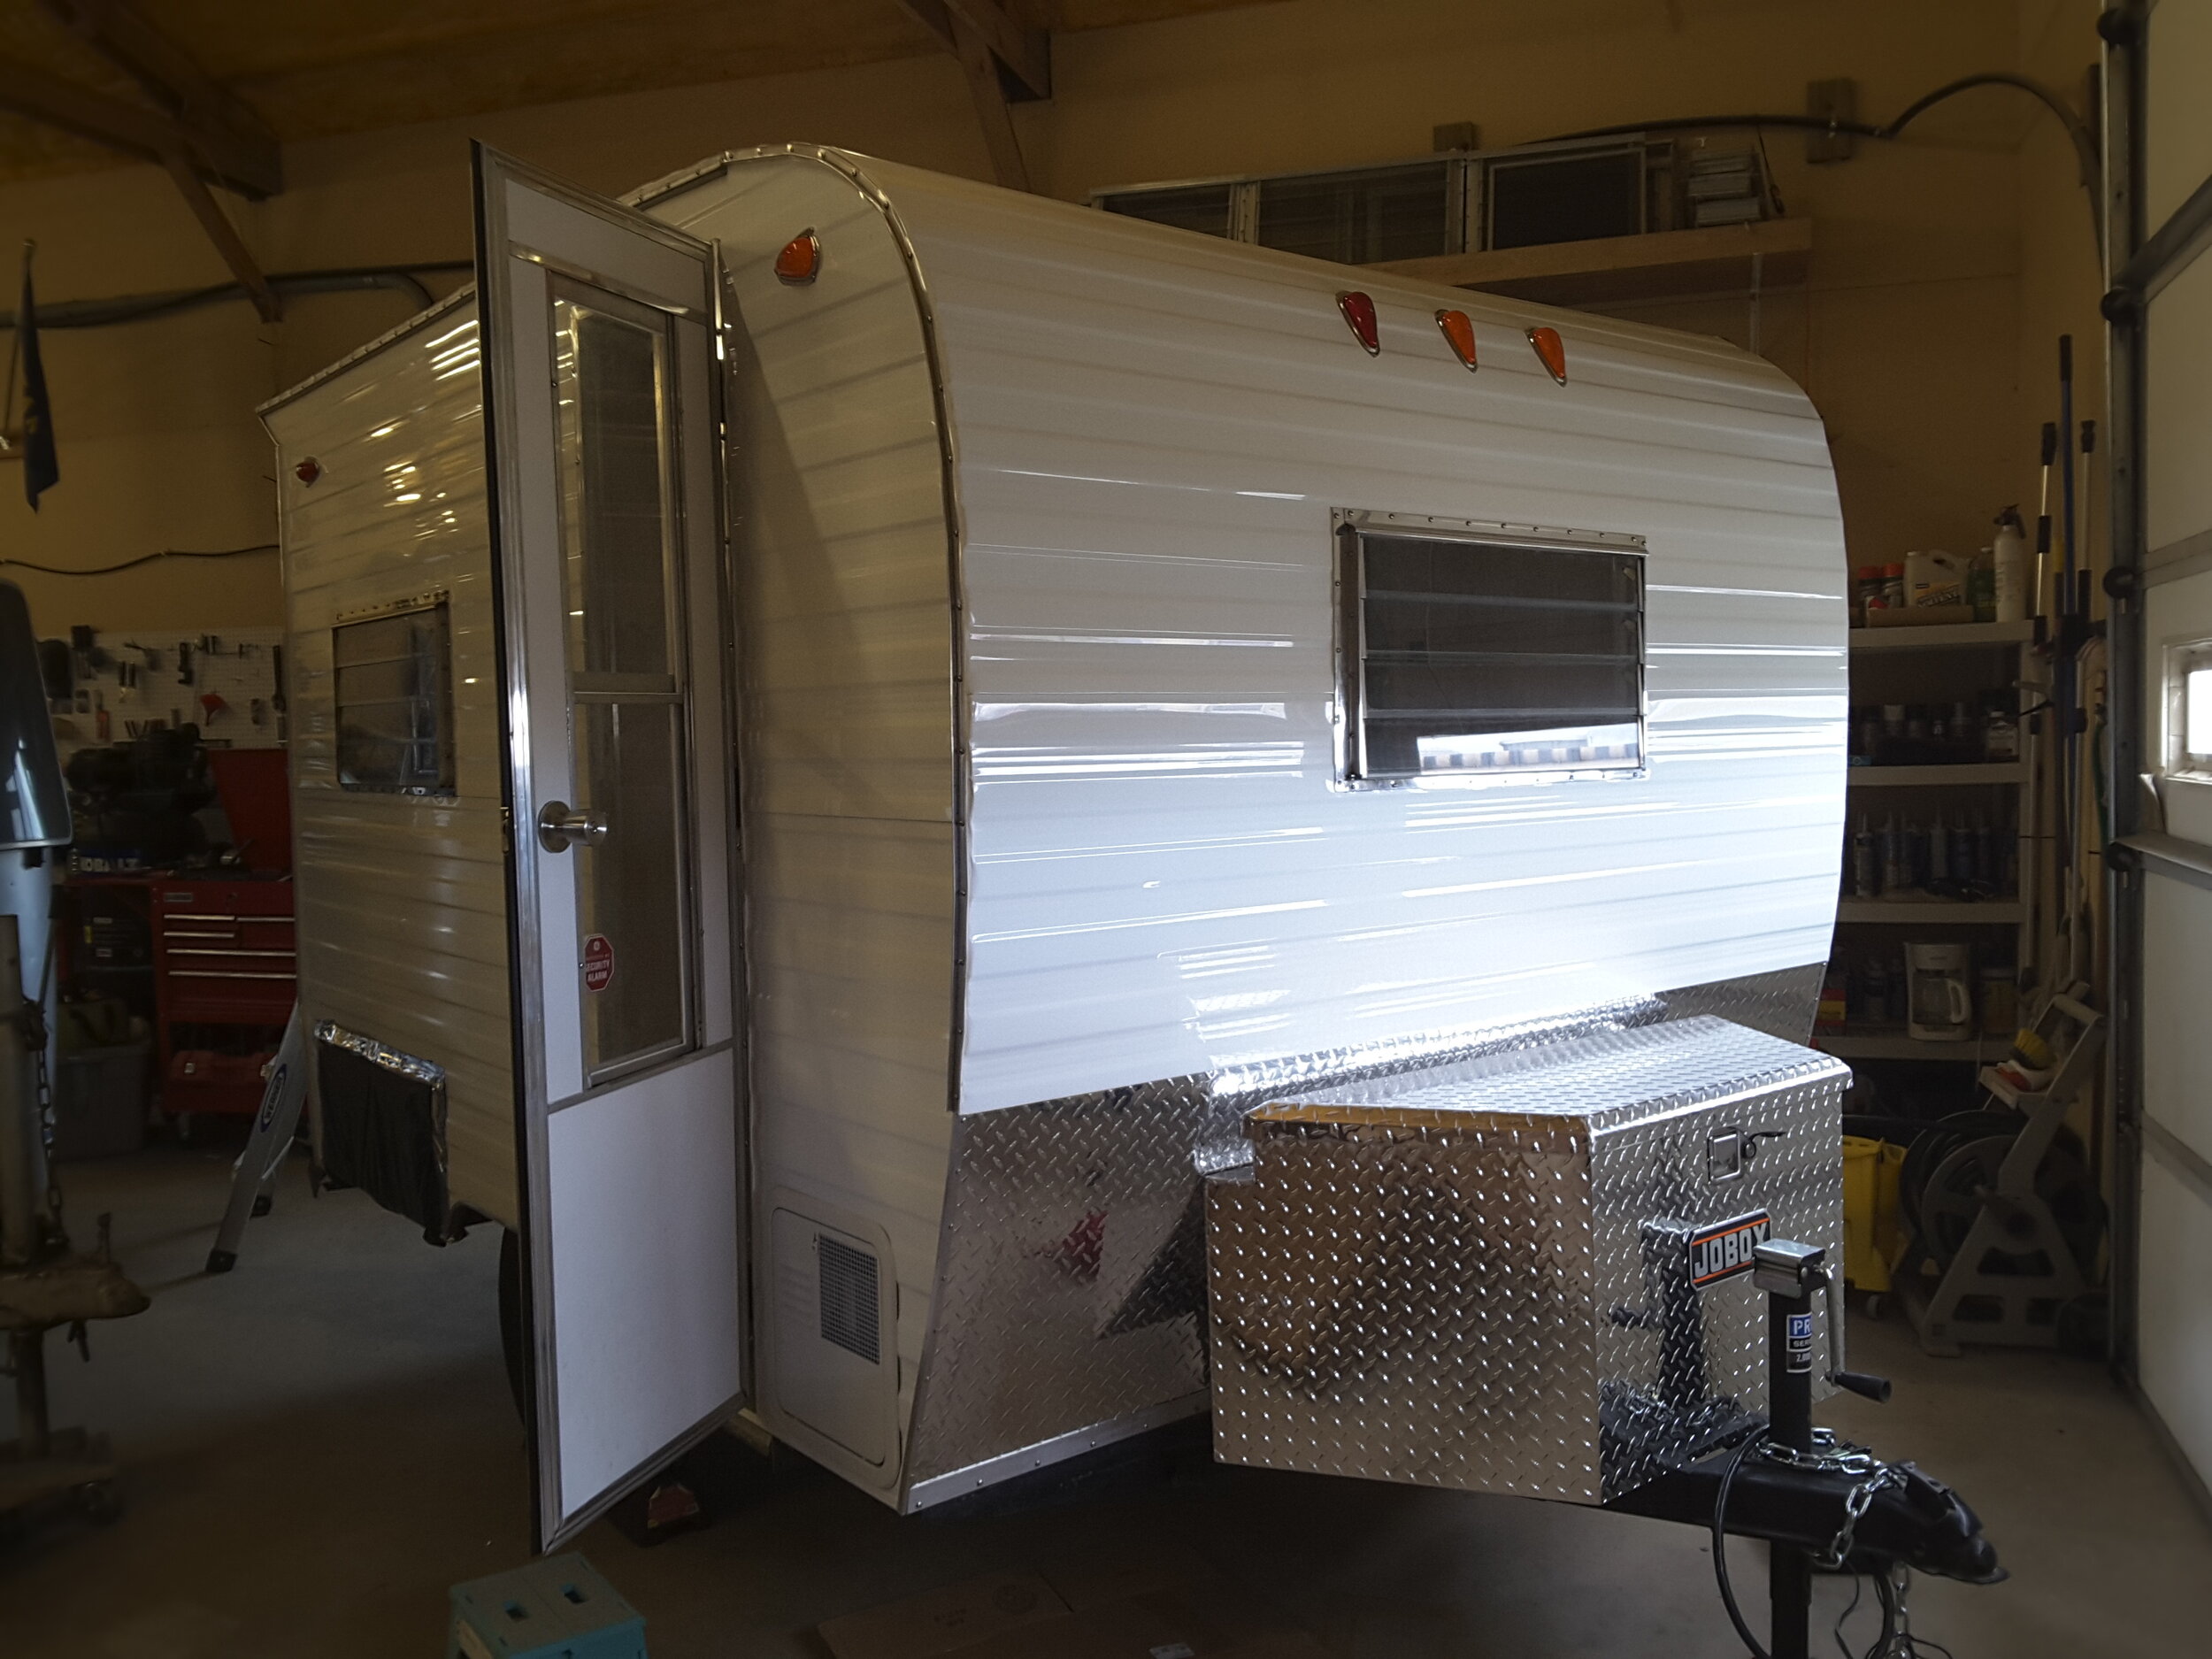
Birdie rising like a Phoenix
. . . . .
The new water heater access door is shown on the lower right. Don’t the window and door frames shine! We love the canned-ham curve of the front but agree the ducktail at the top in the back is very saucy!
It was at this stage — the re-assembly of the interior — that very small measurements started to be a very big deal. We knew the size of the items we wanted to store on the bunk-turned-shelf at the back. That shelf needed to be a minimum of 23 inches wide to accommodate the storage boxes with just enough room to stuff the bed pillows behind them. Much wider and you would start smacking your head on it when trying to sit down in the dinette. Much narrower and there would be colorful language every time we tried to force something to fit.
We also knew the size of the small oil-filled heater that we were planning to use. It was 18 x 16 x 5. We needed a large enough spot in the cabinet to stow the heater, but not too large because that would simply waste space. In this tiny trailer, there was not an inch to squander.
We planned to include a small wooden stool so that you could use the pull-out breadboard like an small table. If someone wanted to sleep a little longer in the morning but the other occupant was ready to get up and have coffee, there would be a place to sit and set your coffee cup. This meant careful measurements to ensure the bottom edge of the closet door would clear the stool when opening and closing; otherwise, having to move the stool every time we opened the closet would have driven us both crazy in a hurry.
Good communication with the wonderful shop crew was really important for these small details. After some months of work and several conversations with the guys, we decided that it might be a good time for a site visit to see the progress, make any needed course corrections, and talk about the finishing work. That was a good decision all around we later agreed.

A 3D Puzzle
. . . . .
Finding space for all the pieces definitely required some compromise, but on the upside, there will be hot water and a water pump! Oh, and we decided to keep the bicycle pump… for the bicycle!
The new water pump was a literal octopus, with lines coming out of it in all directions and angles. It’s on the bottom left in the photo above. On the site visit, I asked if the guys could use adapter fittings to keep the lines a bit closer to the floor and build a shelf above the pump so as not to lose that valuable kitchen cabinet space. Bless them, they did! All of our soaps, cleaning supplies, extra trash bags, and tank treatments fit in the floating cubby they desgined

Any room for a bathroom sink?
. . . . .
The silence on the other end of the phone was thick. And then a long, drawn out “Perrrhappps.” There’s more to this story which will be coming along in the blog. In the meantime you can see eensy-weensy sinks on my Love Bird Pinterest board by clicking below.
The Wrap-Around Shelf
. . . . .
Turns out we adore this shelf! The 5-inch lip keeps everything contained while on the road, and the extra storage on the sides gave us space to install a small TV. We asked the shop to prewire a coax line and a line for headphones. The headphone jack is right behind the headboard. And they added those curvy waves to match the original shelf and headboard.
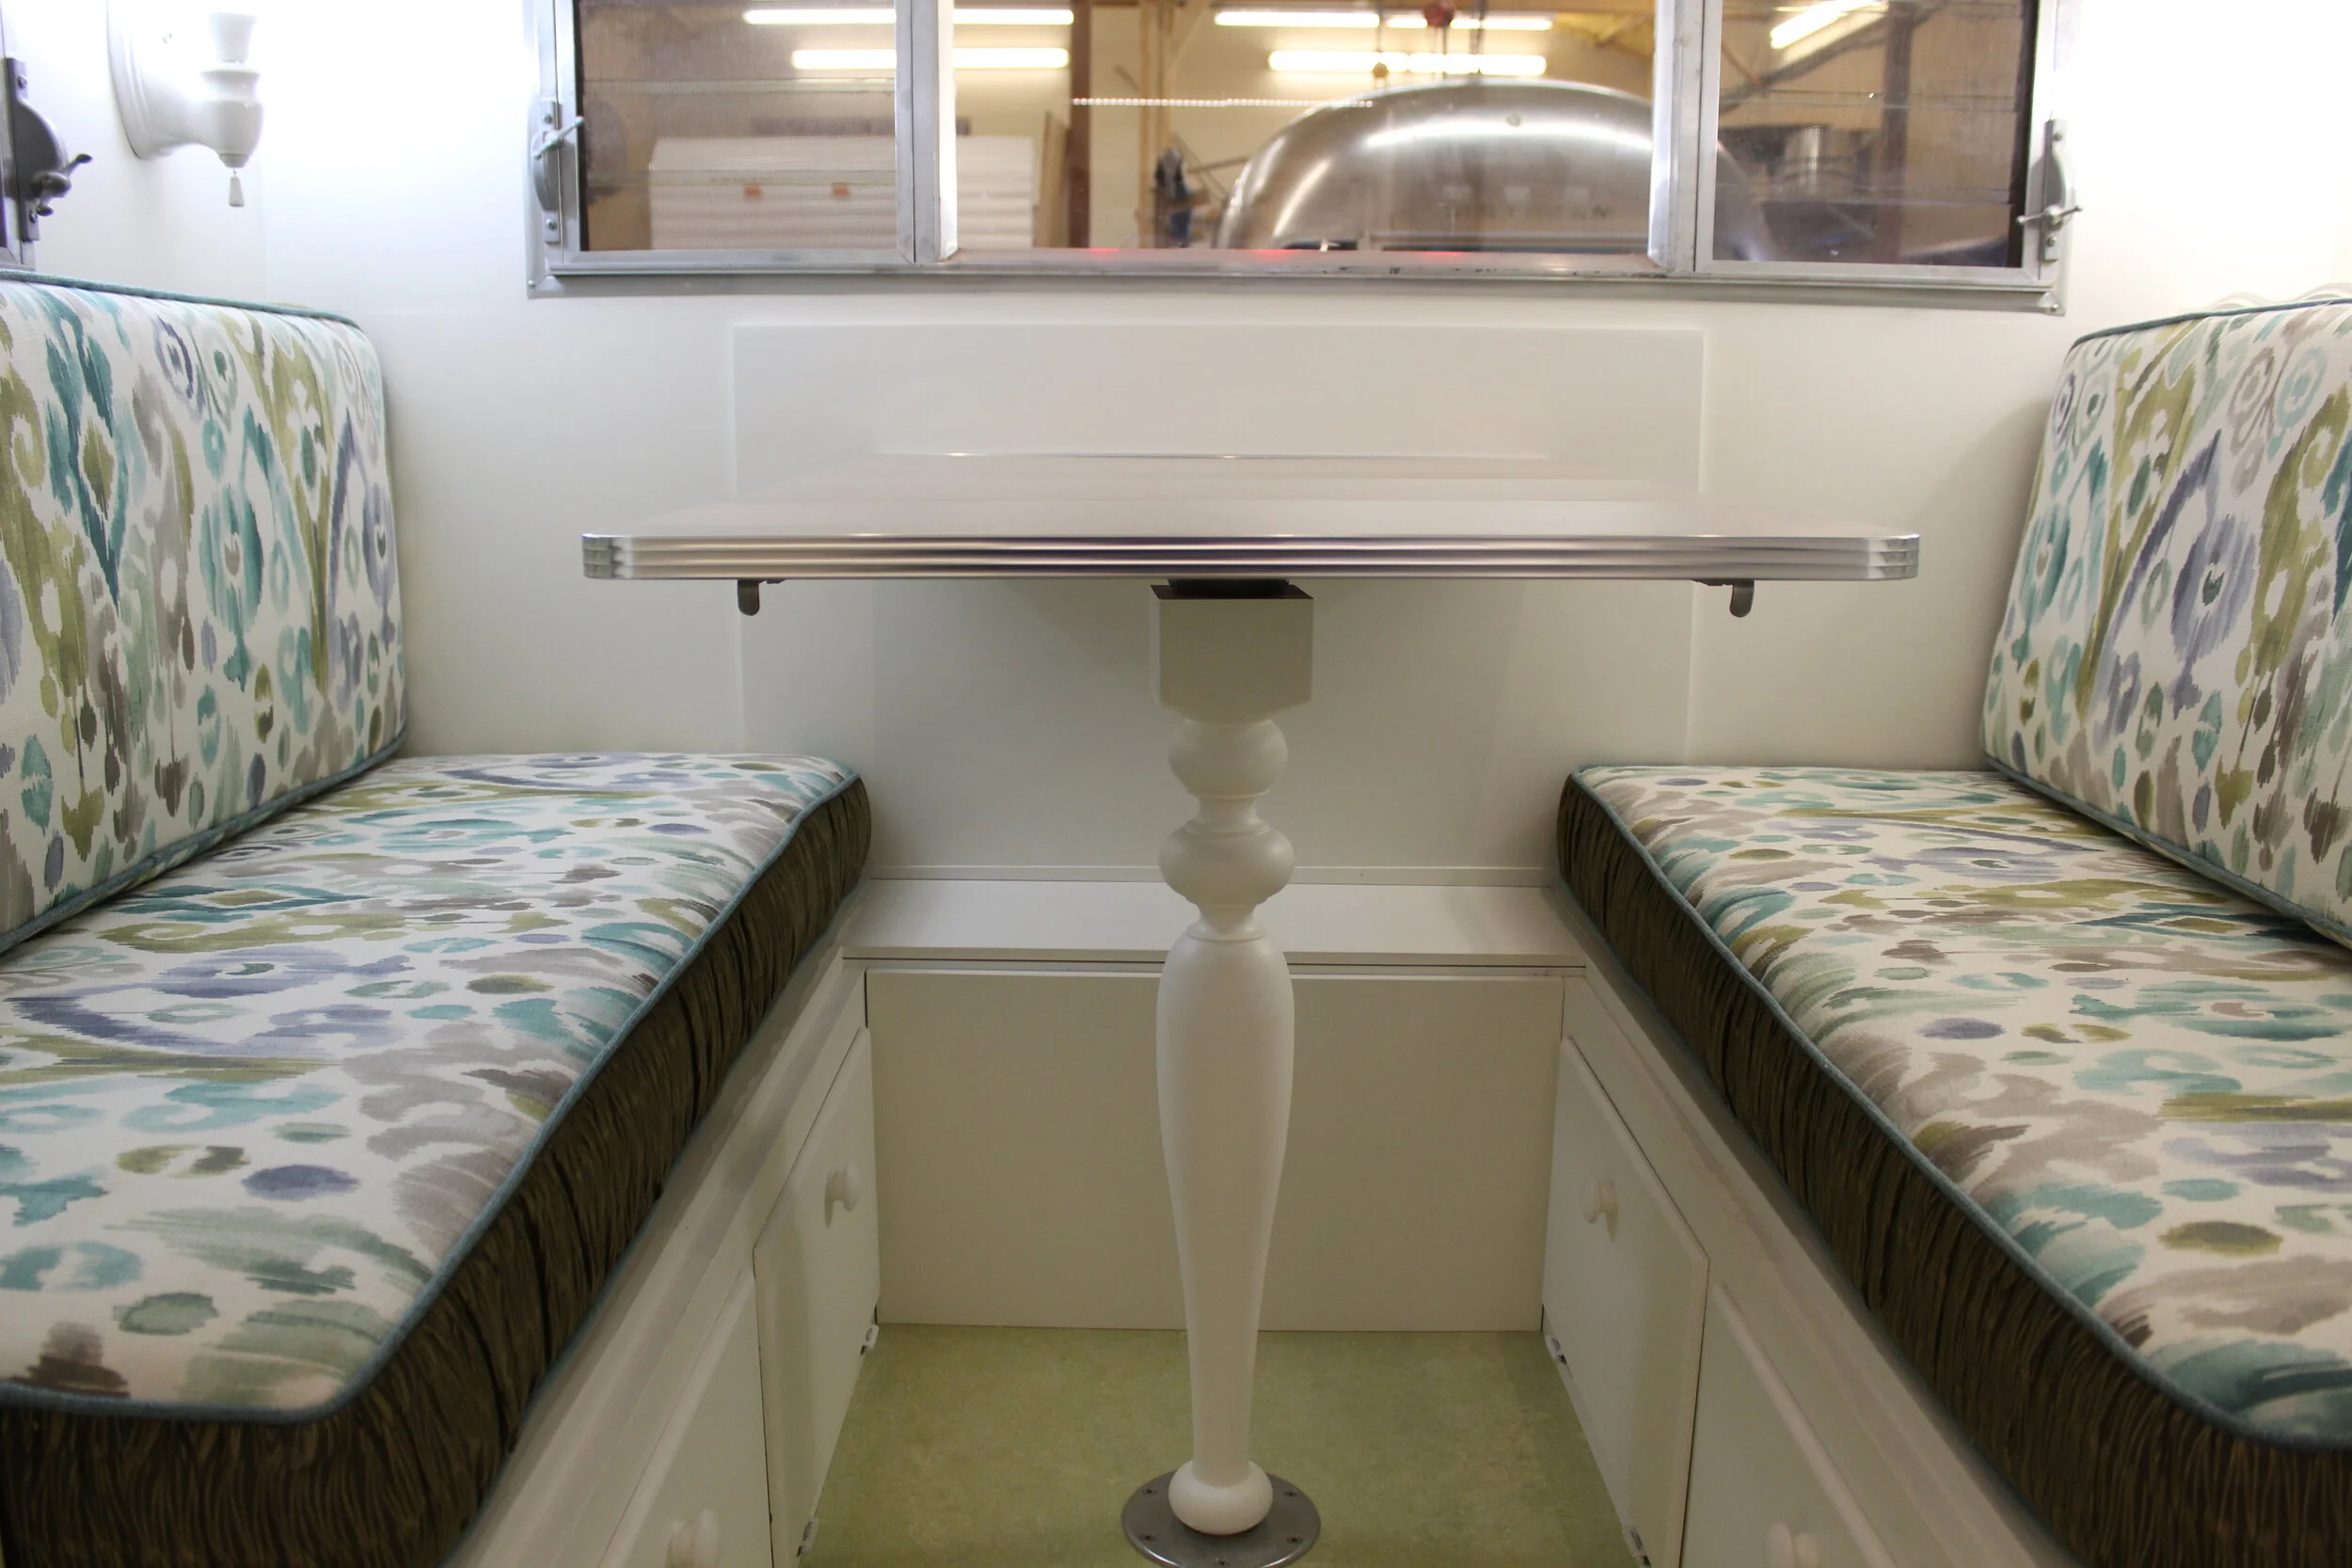
The New Table
. . . . .
The curvy shelf edge made me think about a curvy table leg. There was a fabricator just up the road from the shop as it turned out, and they “turned” out a very graceful one.

With her new tail and running lights, she really glows at night. Somewhere along the way her wedding cake taillights were swapped for rectangular utility lights, but you could still see the outline of the originals. The new taillights are reproductions, but we think they look much better. We are considering a wireless rear-view camera, but we just haven’t seen one yet that we like. The search continues.

It was finally delivery day! We are heading back home to the desert with a shiny bright Cardinal Lovebird.
Bye, Montana, and thank you! We’ll be back for a visit.
Love the trailer hubcaps there, Babe. Nice choice!
. . . . . . . . . . . . . . . . . . . . . . . . .

No sooner did we leave the shop and hit the road for home than we hit a snowstorm that continued until well after dark. That was a white-knuckle ride, but Bridie towed like a dream, a dramatically different experience than the trip up. The little trailer felt solid and calmly tracked right along behind with all her lights glowing! We took it really slow and we learned one of our biggest lessons about towing. Make sure you have your speed under control heading downhill. The entire weight of the trailer is attempting to get to the bottom of the hill before you do. It will be a bad day at Black Rock if the trailer wins that race!
. . . . . . . . . . . . . . .

Getting Her Wings
. . . . .
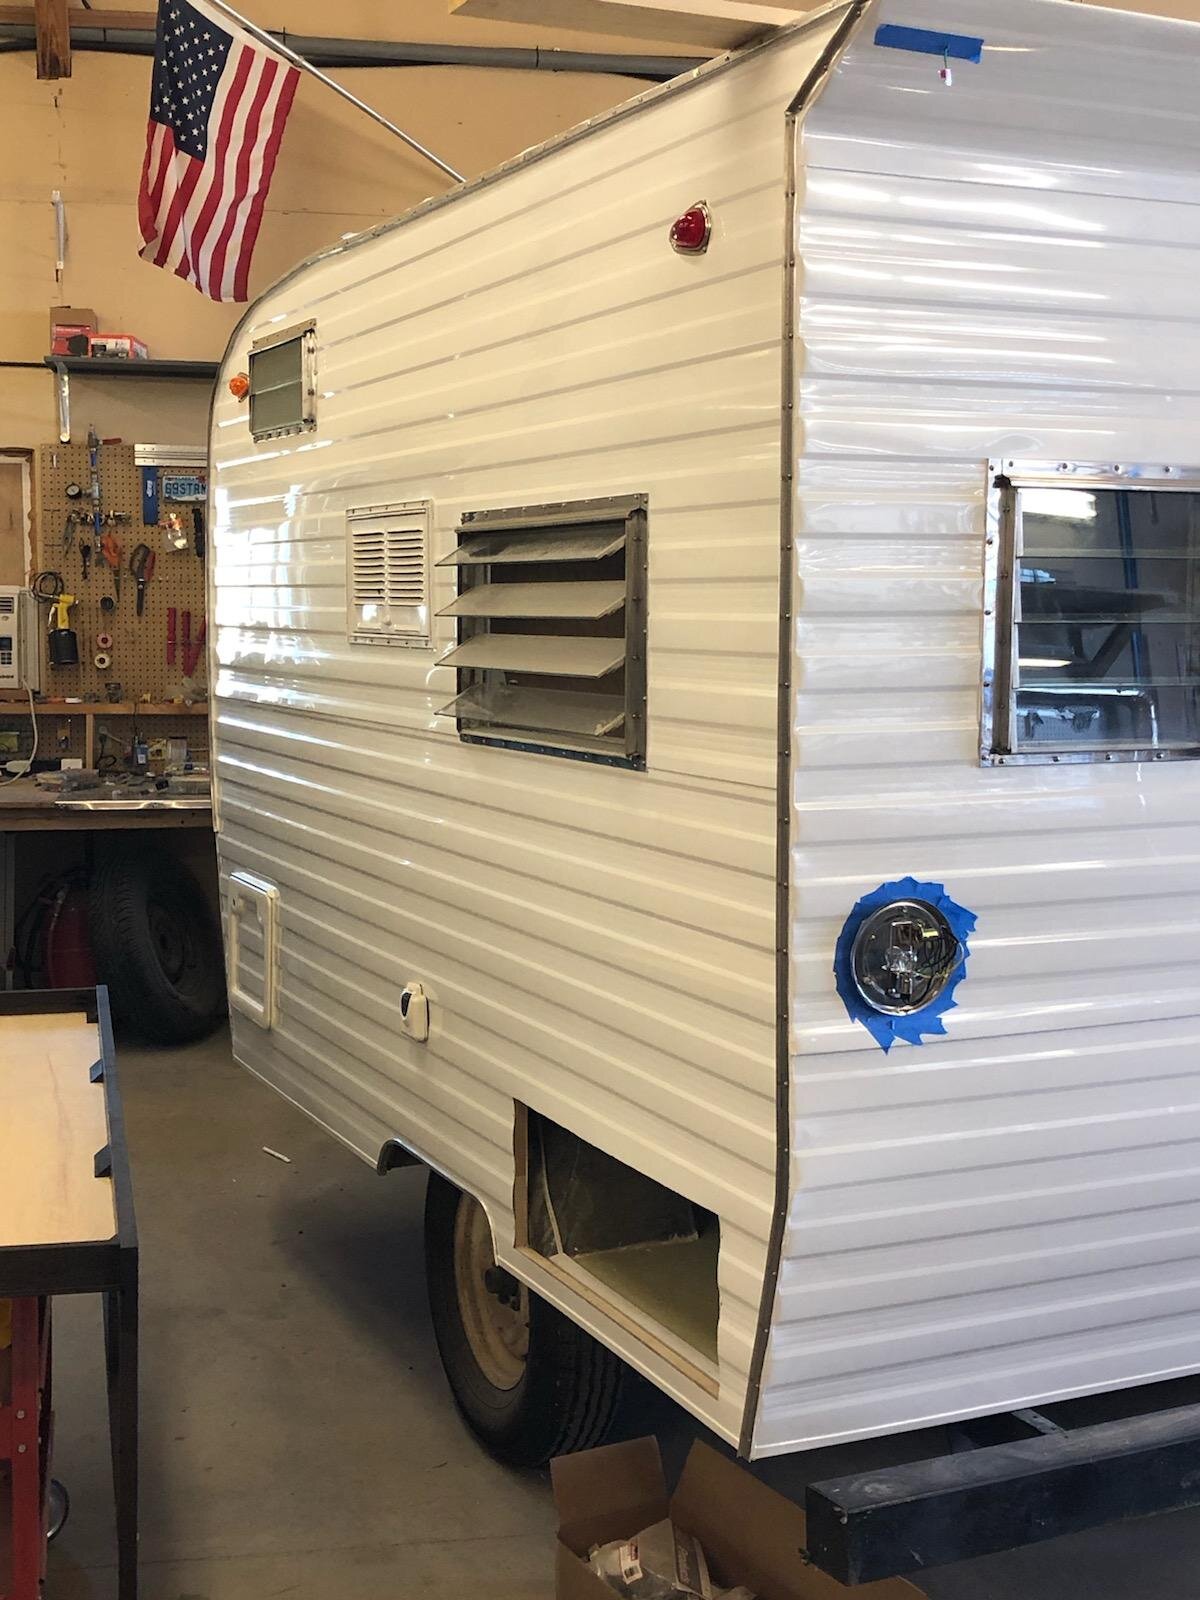
We were back home in the desert, and it was time for Birdie to be painted. We worked with a local shop that came highly recommended, and they really took the time to look at the many images we brought in and to plan and lay out her stylized wing graphics. We think they did a superb job! They were even able to pound out the dent I managed to put in the front tongue box as I was learning to back her up. Whew and thanks so much!
We never really considered anything other than the classic Cardinal graphics, but I had such fun looking at the many wonderful vintage trailers out there with great graphics! Hats off to creativity!

Birdie is nearly finished!
. . . . .
We’re ready to go camping! You can just see the bike rack on the back. It holds two bikes, and with the trailer loaded now, we still have good weight distribution. We looked at a number of rack styles, but when the bikes are off, this rack provides a really handy, full-width platform. We can put an ice chest or a small BBQ there, and when setting up camp, it is nice to have a spot out of the dirt to put things down.

Decked Out
. . . . .
Birdie came with a track for an awning. I can recall the awning my parents had on their camper when I was a child. It always seemed to be such a struggle to get up and down. My dad tried to talk me into a retractable awning, likely reliving his memories of those struggles, but I really wanted the look of this period style awning. I worked with a great fabricator who helped me decide on the type of fabric and the style, and it was an absolutely perfect fit and slid into the track in under a minute, slick as you please. It even arrived with a tote bag and a cover for the front rock guard.
The mat was a thrift store find, as were the deck chairs.
. . . . . . . . . . . . . . .
With Birdie’s exterior mainly complete, we focused on her interior. We still had a few plans for exterior mods — more on those in the blog — but we decided we just wanted to camp with her a few times to see what worked and what still might need tweaking. We figured we still had a lot to learn.
We were still pretty much observing COVID-19 lock-down during the summer of ‘20, so we spent time reading over manuals and generally getting to know every inch of Birdie. I used the time to sew her blinds, hang things on her walls and stow her gear and supplies — I loved this part, and I hope you will too as we head on to her interior shots.

. . . . . . . . . .
“Why do you go away? So that you can come back. So that you can see the place you came from with new eyes and extra colors. And the people there see you differently, too. Coming back to where you started is not the same as never leaving.”
— Sir Terry Pratchett